• Bloglovin
  • Email
  • Facebook
  • Instagram
  • Pinterest
  • Twitter
  • ABOUT
  • OUR HOME
    • New Home | HOH Southern Capecod
    • Farmhouse Rental
    • Second Home
    • First Home
  • DECOR
    • NEW HOME: HOH Southern Cape Cod
    • Farmhouse Decor
    • Kitchens
    • Living Rooms
    • Dining Rooms
    • Bedrooms
    • Bathrooms
    • Office
    • Laundry|Mudrooms
    • Home Tours
    • Holidays
      • Christmas
      • Fall
      • Halloween
      • Other
    • DIY
    • FRIDAY FINDS
    • Furniture Finds
    • Shopping Finds
  • LIFESTYLE
    • Beauty
      • Beauty Diaries
    • Weight Loss | Plastic Surgery
    • Fashion
    • Family
    • Travel
    • Food
    • Parties
    • Printables
    • Personal
  • SHOP
    • SHOP MY INSTAGRAM
    • FRIDAY FINDS
    • TOP SELLERS
    • AMAZON FAVORITES
    • WALMART FINDS
    • MY HOME
      • MY HOME: FARMHOUSE RENTAL
      • MY HOME: MCKINNEY
    • BEAUTY
    • MY SKINCARE
    • FURNITURE
  • CONTACT
    • COLLABORATE
  • HOLIDAY GIFT GUIDES

Avery’s Pink Tufted Mantle Headboard

June 12, 2014 By Elaine

I am in the process of working on Avery’s “big girl room”.  I hope to have this complete by the end of the summer so I will be blogging all the updates.
I wanted her to have a unique headboard.  I love tufting, pink and mantles SO…when I found this amazing fireplace mantle I knew it was meant to be!!  It was exactly what I wanted!
I have linked up at Love of Family & Home BLOG with this project.
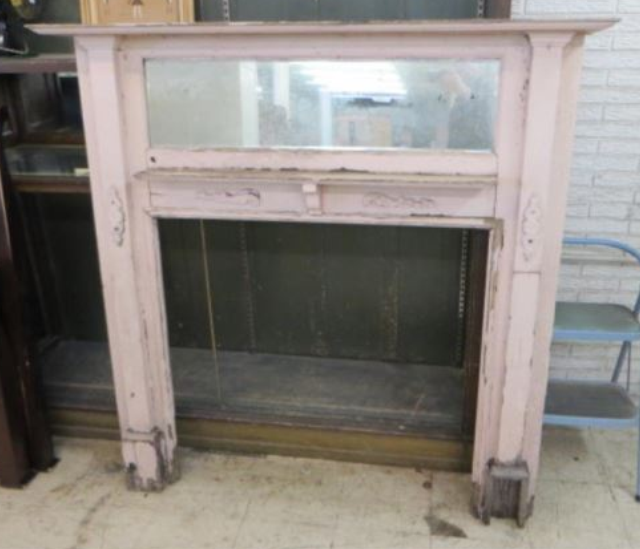
I sanded it down a bit, added some glaze and sealant to make sure to get all the flaky paint sealed and gave it a good cleaning!!!
Now it was time to start tufting it!  I have a tufted mantle headboard in my guest room and I love it!

  1. FABRIC:  I used a canvas drop cloth from Lowes.  These are the best because they look so good, are durable, huge and super cheap!  This one is only $10.98 and I still had a lot left over.  Wash it before you use it.
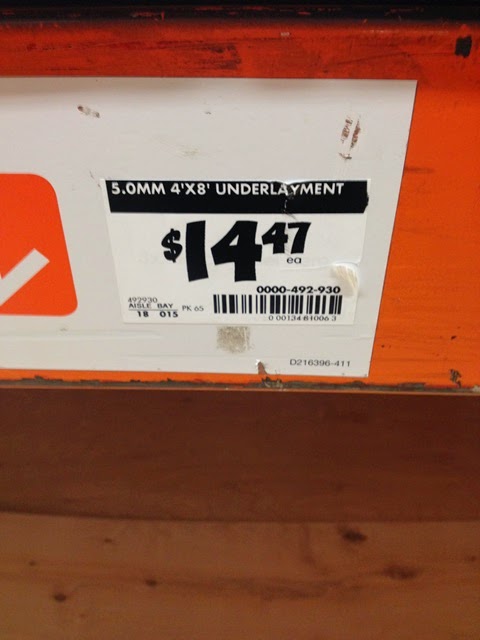
  2. BOARD:  Measure the back opening of the mantle with about an inch extra on each side so you can attach it.  I bought a board at Home Depot for $14.97 and had it cut.  Here is the barcode for what I bought and a photo of the cut board.
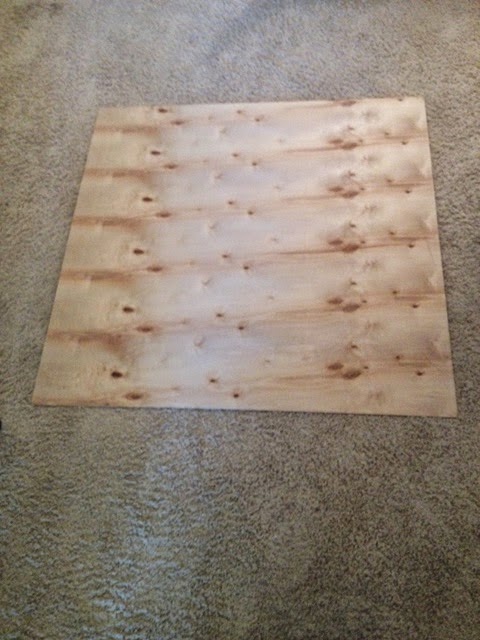

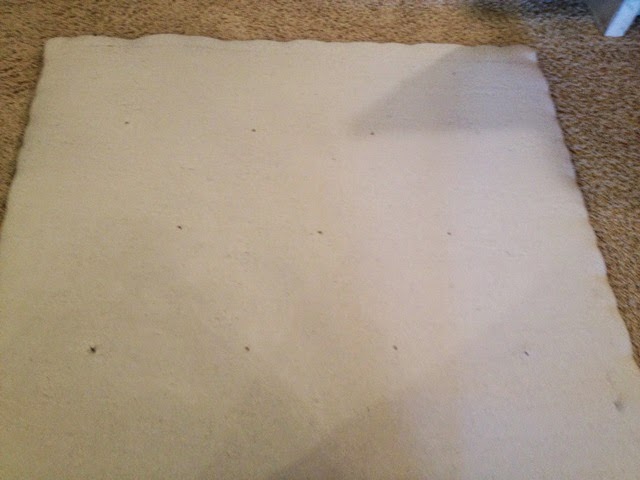
3.  FOAM: This stuff is really expensive so I bought a mattress topper instead.  It works perfectly!  It is a much larger size and so much cheaper.  I bought the full size      one for $24 at Walmart.  Get one HERE.
    4.  PROCESS: 
  • cut the foam down to size and lay the textured side down on the board.  Next you take your fabric and lay it over the board and use a staple gun to attach it all around the board.  Pull the fabric super tight so there is no puckering.


  • After you have the fabric on the board you need to decide where you want your buttons to go.  I laid them out on the board and eyeballed the way I wanted it.  Then I put a sharpie dot where I wanted them to go so I knew where to drill the holes.
  • Next, drill holes where your dots are.  This is where you will pull the buttons through.
  • Now we need to talk about how to make Fabric covered buttons!

I bought a button kit at Hobby Lobby for less than $5.  It has everything you need to do this (except the fabric)  Here is what it looks like.  It comes with 3 buttons (you can buy extra of these because you will want more buttons for the tufting…I bought 12), a blue piece that helps push the button back on, and a white piece that you lay the fabric over and push the button into.

Here is a step-by step on how to make the fabric buttons:
Here is the final product…
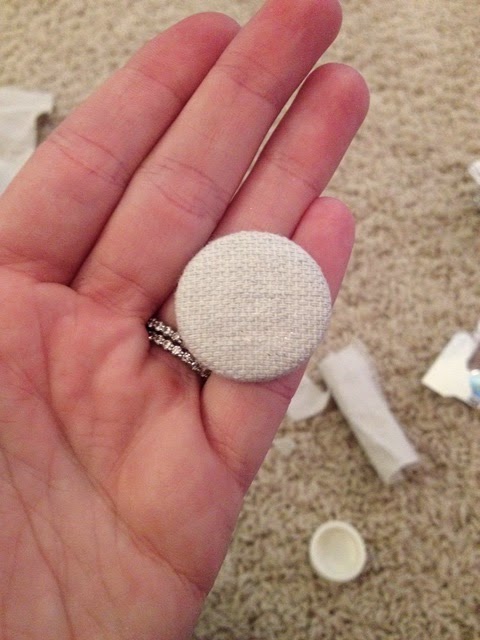
  • Now that you have the buttons complete it is time to add them to the fabric covered board that you have completed.  
  • Tie super strong thread (I used twine) to the back of the buttons (they all have little metal loops) and leave a long string.  
  • Then get a crochet needle and use this to pull the string through the holes you drilled into your fabric cover board.  This is what it will look like from the back once you pull them through all the holes.
  • Now it is time to tighten everything.  Push the front of the buttons down as hard as you can in the foam so it creates a puckering in the foam and pull the string from the back super tight and staple it down.  I stapled the string on the back side and then knotted it around the staple to make sure it was super secure.  Do this to each button and it will create a tufted look! Here is a close up of the back…not very pretty from this side, but it works.

  • Here is a view from the other side once you have completed this process.
  • Now it is time to attach it to the actual mantle.  Lay this board on the back of the mantle and screw it in at the sides.  This is why you make the board about an inch wider on each side so there is room to attach it.  Here is what it will look like from the back.
AND HERE IS THE FINAL PRODUCT!!
Now it was just time to attach it to the wall!  Find the studs!!!  This is heavy!  Then you just screw the mantle directly into the studs above the bed and you are all set.
Here is what it looks like in Avery’s room!
I love the way it turned out!!
I still have lots to do in this room.  The pink door behind the nightstand is going to a different spot.  I love the way the lamps turned out.  You can read about that HERE.
My nightstands were old washstands that I completely redid.  Here is the before and after…
I will keep you posted as I finish the rest of the transformation.
This will be a busy summer with all my projects!
SUMMER PROJECTS
–Braden’s Nursery
-Finish Avery’s Big Girl Room
-Move Guest Room upstairs
-Change current Guest Room into Playroom!
Stay tuned….

Comments

  1. Jennifer says

    July 12, 2014 at 3:28 pm

    I love the way the headboard turned out…..thanks for giving me ideas for my own mantle headboard!!!

  2. feathersanddimes says

    August 8, 2014 at 12:47 pm

    This is wonderful! Been looking for a mantle to fit a queen size bed…hard to come by.

  3. feathersanddimes says

    August 8, 2014 at 12:48 pm

    I love this!

  4. feathersanddimes says

    August 8, 2014 at 12:48 pm

    I love this project so much! I have been looking for a mantle to use for a queen size bed to do just this same thing. Great job!

  5. Erin Melikidse says

    August 8, 2014 at 3:36 pm

    I really like this idea, you did a great job

  6. Elaine says

    August 8, 2014 at 3:37 pm

    Thanks so much for stopping by! Really appreciate it!

  7. Elaine says

    August 8, 2014 at 3:37 pm

    Thanks Erin! Appreciate you stopping by!

  8. Elaine says

    August 8, 2014 at 3:38 pm

    Thanks Jennifer! 🙂

  9. Lisa Marie Wells says

    August 11, 2014 at 2:46 am

    That is an amazing idea!!! And it came out perfect!! Love the comforter!! Where did you find it??

  10. Elaine says

    August 11, 2014 at 2:48 am

    Thanks LIsa!! The comforter is the Shabby Chic collection from Target! Will be doing an entire blog post on Avery's big girl room soon and list all the items in it. Thanks for stopping by!

  11. Zachery Rollins says

    October 14, 2016 at 12:14 pm

    bookmarked!!, I like your web site!

    • houseofhargrove@gmail.com says

      October 14, 2016 at 8:40 pm

      Thank you so much!

  12. Sue Leroy says

    November 19, 2016 at 8:26 am

    very cool idea! Great Job

Meet Elaine

Subscribe to Our Newsletter

SM13-50-Burlap-Facebook SM13-50-Burlap-Instagram SM13-50-Burlap-Mail SM13-50-Burlap-Pinterest SM13-50-Burlap-TwitterBird BLOGLOVING

Home
Fashion
Beauty
Travel
Family
Food
Holidays

instagram
Open post by houseofhargrove with ID 18083062979229764
✨ The NSALE is officially open to everyone! ✨

💛COMMENT “SHOP” to have my top picks sent directly to your DM

https://liketk.it/6iIxG #nsale
Open post by houseofhargrove with ID 18085124840187784
✨NSALE TOP PICKS ✨

The Nordstrom Anniversary Sale is here! It can definitely feel a little overwhelming, so I rounded up my favorite finds to make shopping easier.

💛 comment SHOP to have links sent directly to your DM

You’ll find:
🤍 Great wardrobe staples
🤍 Cute new additions for fall
🤍 Tried-and-true favorites I own and love

If you’re Influencer level, you can start shopping today. Everyone else gets access beginning July 18!

Everything is linked in my LTK and Stories. Happy shopping! 

https://liketk.it/6ixdZ
#nsale #nordstromanniversarysale
Open post by houseofhargrove with ID 18090338072630817
I love storage and making sure everything has its place. This wrapping paper station has been one of the most functional additions to our laundry room…keeping everything organized, easy to grab, and ready for birthdays, holidays, and last-minute gifts!
Open post by houseofhargrove with ID 18069887810391130
Hope everyone had a wonderful 4th of July 
🇺🇸❤️🤍💙🇺🇸
Open post by houseofhargrove with ID 18598008775000234
Happy 4th of July friends! 250 years!!
🇺🇸❤️🤍💙🇺🇸
Open post by houseofhargrove with ID 18099972236162630
Callie is ready for the Fourth of July!! ❤️🤍💙
Open post by houseofhargrove with ID 18169512274436834
🤣🥵
Open post by houseofhargrove with ID 18087520403431316
PRIME DAY is going strong
💙 comment SHOP to have my picks sent to your DM

It can be overwhelming, but I’m sharing my favorite tried & true items!
Open post by houseofhargrove with ID 18343558450175682
💙 AMAZON PRIME DAY IS HERE 💙

💛comment SHOP for my top picks to be sent directly to your DM
Open post by houseofhargrove with ID 18369561049230939
SIMPLY. THE. BEST. We are so lucky.
Happy Father’s Day. Hope you had a wonderful day celebrating the special men in your life!
Open post by houseofhargrove with ID 18091075859057051
✨REMODEL UPDATE: GAME ROOM + MUDROOM ✨

This space received a cosmetic refresh, but the biggest improvement was making it more functional. Since this room is located just off the garage entry, we transformed an underutilized wall into a custom mudroom with built-ins for backpacks, shoes, sports gear, and everyday essentials. Before, there was no designated drop zone and I truly believe every home needs one. Now this space is both beautiful & functional.

➡️ Swipe to see the before & after photos
🤎 Comment SHOP for sources

For the cosmetic updates, we:
•Replaced the tile and carried the hardwood flooring throughout
•Painted the walls a warm, cozy color
•Removed the farmhouse barn doors and installed timeless French doors
•Furnished the room with Facebook Marketplace finds
•Added a vintage dog gallery wall 

Now it’s the perfect spot for the kids to hang out, do homework, watch TV, and drop all their daily essentials when they walk in the door.

https://liketk.it/6giWj
#hohremodel
Open post by houseofhargrove with ID 17867294820567121
❤️🤍🩵
Open post by houseofhargrove with ID 17887127817405975
Just left our happy place. 🤍

So many memories made at Carlton Landing over the years, and already counting down until we can come back.
Open post by houseofhargrove with ID 18084897875386266
🤣 Happy travels
Open post by houseofhargrove with ID 18088331066529196
🇺🇸🌸🍐🍋🍊
Open post by houseofhargrove with ID 18137899357552578
Summer…I love you ❤️
Open post by houseofhargrove with ID 18145567132511435
✨REMODEL UPDATE: POWDER BATH✨

This bath got a huge cosmetic update & reconfiguration.
It had a very awkward angle in the corner that kind of threw off the space. We disguised it with custom cabinetry and a faux panel. This added useful storage, design & now you’d never know there was a strange angle. 

🤎comment SHOP for sources

Some fun wallpaper, paint, counter details, hardware & sconces finished off this great space.

Now functional & beautiful.

https://liketk.it/5XIMI
#hohremodel
Open post by houseofhargrove with ID 18321700246257900
❤️🤍💙
Open post by houseofhargrove with ID 18104306125955487
Summertime = kitchen open 24/7 ☀️🤪
Open post by houseofhargrove with ID 18138723325534055
🇺🇸 Happy Memorial Day 🇺🇸

Today we remember and honor the brave men and women who made the ultimate sacrifice for our freedom. Forever grateful.❤️💙
Open post by houseofhargrove with ID 18356767756212944
🤣🤣

House of Hargrove | Site Design via Self Made from Scratch


Disclosure Policy . Privacy Policy Bluehost