• Bloglovin
  • Email
  • Facebook
  • Instagram
  • Pinterest
  • Twitter
  • ABOUT
  • OUR HOME
    • New Home | HOH Southern Capecod
    • Farmhouse Rental
    • Second Home
    • First Home
  • DECOR
    • NEW HOME: HOH Southern Cape Cod
    • Farmhouse Decor
    • Kitchens
    • Living Rooms
    • Dining Rooms
    • Bedrooms
    • Bathrooms
    • Office
    • Laundry|Mudrooms
    • Home Tours
    • Holidays
      • Christmas
      • Fall
      • Halloween
      • Other
    • DIY
    • FRIDAY FINDS
    • Furniture Finds
    • Shopping Finds
  • LIFESTYLE
    • Beauty
      • Beauty Diaries
    • Weight Loss | Plastic Surgery
    • Fashion
    • Family
    • Travel
    • Food
    • Parties
    • Printables
    • Personal
  • SHOP
    • SHOP MY INSTAGRAM
    • FRIDAY FINDS
    • TOP SELLERS
    • AMAZON FAVORITES
    • WALMART FINDS
    • MY HOME
      • MY HOME: FARMHOUSE RENTAL
      • MY HOME: MCKINNEY
    • BEAUTY
    • MY SKINCARE
    • FURNITURE
  • CONTACT
    • COLLABORATE
  • HOLIDAY GIFT GUIDES

Avery’s Pink Tufted Mantle Headboard

June 12, 2014 By Elaine

I am in the process of working on Avery’s “big girl room”.  I hope to have this complete by the end of the summer so I will be blogging all the updates.
I wanted her to have a unique headboard.  I love tufting, pink and mantles SO…when I found this amazing fireplace mantle I knew it was meant to be!!  It was exactly what I wanted!
I have linked up at Love of Family & Home BLOG with this project.
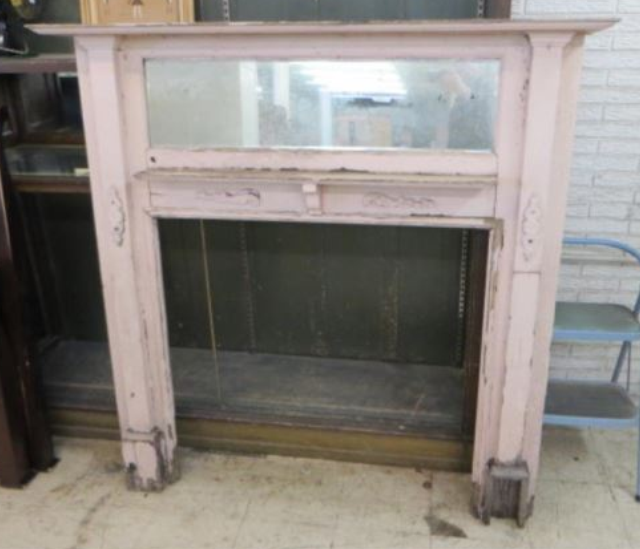
I sanded it down a bit, added some glaze and sealant to make sure to get all the flaky paint sealed and gave it a good cleaning!!!
Now it was time to start tufting it!  I have a tufted mantle headboard in my guest room and I love it!

  1. FABRIC:  I used a canvas drop cloth from Lowes.  These are the best because they look so good, are durable, huge and super cheap!  This one is only $10.98 and I still had a lot left over.  Wash it before you use it.
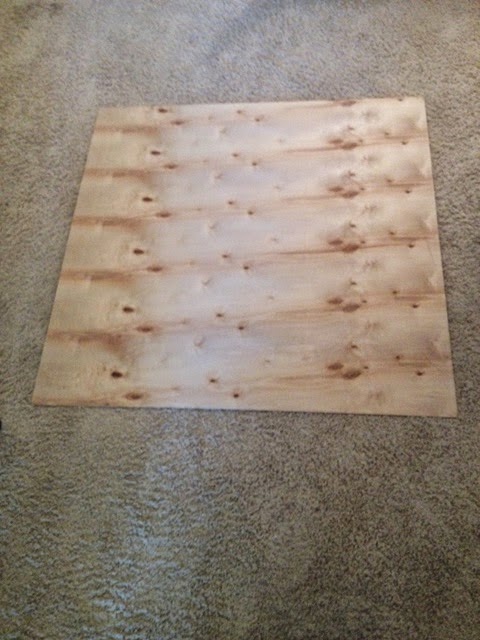
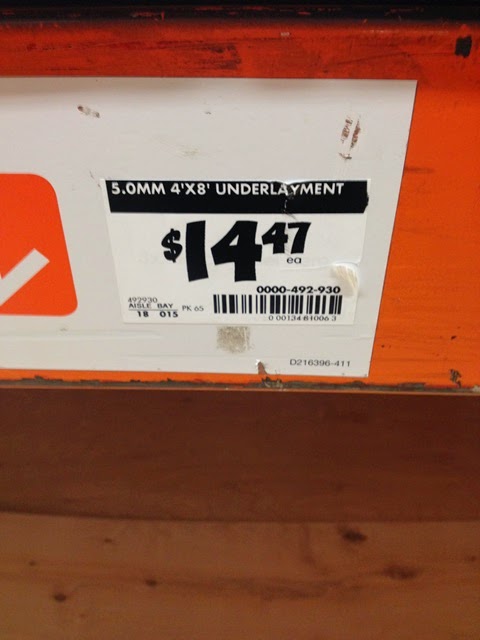
  2. BOARD:  Measure the back opening of the mantle with about an inch extra on each side so you can attach it.  I bought a board at Home Depot for $14.97 and had it cut.  Here is the barcode for what I bought and a photo of the cut board.


3.  FOAM: This stuff is really expensive so I bought a mattress topper instead.  It works perfectly!  It is a much larger size and so much cheaper.  I bought the full size      one for $24 at Walmart.  Get one HERE.
    4.  PROCESS: 
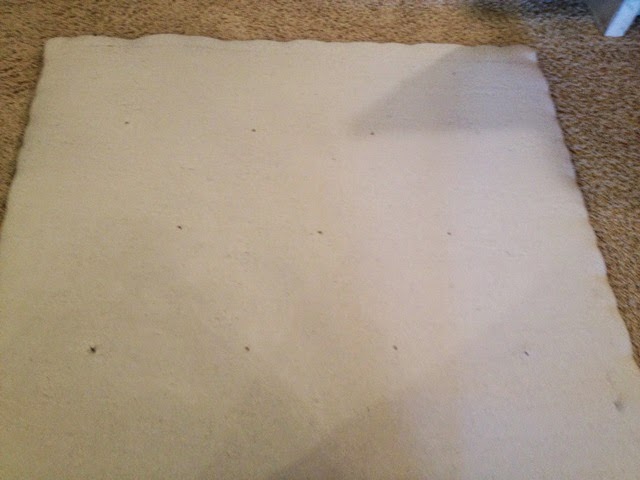
  • cut the foam down to size and lay the textured side down on the board.  Next you take your fabric and lay it over the board and use a staple gun to attach it all around the board.  Pull the fabric super tight so there is no puckering.


  • After you have the fabric on the board you need to decide where you want your buttons to go.  I laid them out on the board and eyeballed the way I wanted it.  Then I put a sharpie dot where I wanted them to go so I knew where to drill the holes.
  • Next, drill holes where your dots are.  This is where you will pull the buttons through.

  • Now we need to talk about how to make Fabric covered buttons!

I bought a button kit at Hobby Lobby for less than $5.  It has everything you need to do this (except the fabric)  Here is what it looks like.  It comes with 3 buttons (you can buy extra of these because you will want more buttons for the tufting…I bought 12), a blue piece that helps push the button back on, and a white piece that you lay the fabric over and push the button into.

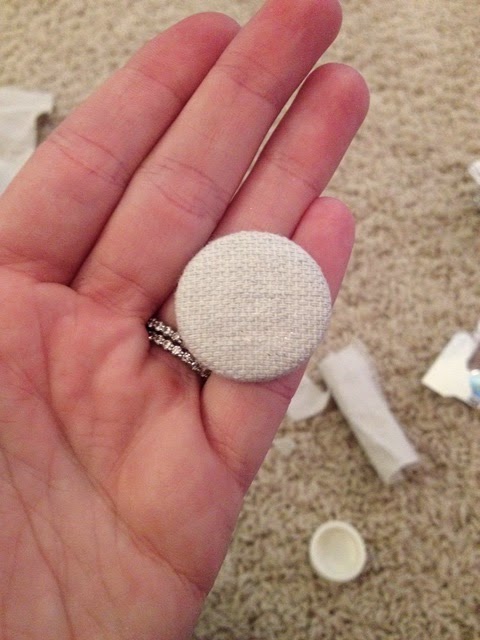
Here is a step-by step on how to make the fabric buttons:
Here is the final product…
  • Now that you have the buttons complete it is time to add them to the fabric covered board that you have completed.  
  • Tie super strong thread (I used twine) to the back of the buttons (they all have little metal loops) and leave a long string.  
  • Then get a crochet needle and use this to pull the string through the holes you drilled into your fabric cover board.  This is what it will look like from the back once you pull them through all the holes.
  • Now it is time to tighten everything.  Push the front of the buttons down as hard as you can in the foam so it creates a puckering in the foam and pull the string from the back super tight and staple it down.  I stapled the string on the back side and then knotted it around the staple to make sure it was super secure.  Do this to each button and it will create a tufted look! Here is a close up of the back…not very pretty from this side, but it works.

  • Here is a view from the other side once you have completed this process.
  • Now it is time to attach it to the actual mantle.  Lay this board on the back of the mantle and screw it in at the sides.  This is why you make the board about an inch wider on each side so there is room to attach it.  Here is what it will look like from the back.
AND HERE IS THE FINAL PRODUCT!!
Now it was just time to attach it to the wall!  Find the studs!!!  This is heavy!  Then you just screw the mantle directly into the studs above the bed and you are all set.
Here is what it looks like in Avery’s room!
I love the way it turned out!!
I still have lots to do in this room.  The pink door behind the nightstand is going to a different spot.  I love the way the lamps turned out.  You can read about that HERE.
My nightstands were old washstands that I completely redid.  Here is the before and after…
I will keep you posted as I finish the rest of the transformation.
This will be a busy summer with all my projects!
SUMMER PROJECTS
–Braden’s Nursery
-Finish Avery’s Big Girl Room
-Move Guest Room upstairs
-Change current Guest Room into Playroom!
Stay tuned….

Comments

  1. Jennifer says

    July 12, 2014 at 3:28 pm

    I love the way the headboard turned out…..thanks for giving me ideas for my own mantle headboard!!!

  2. feathersanddimes says

    August 8, 2014 at 12:47 pm

    This is wonderful! Been looking for a mantle to fit a queen size bed…hard to come by.

  3. feathersanddimes says

    August 8, 2014 at 12:48 pm

    I love this!

  4. feathersanddimes says

    August 8, 2014 at 12:48 pm

    I love this project so much! I have been looking for a mantle to use for a queen size bed to do just this same thing. Great job!

  5. Erin Melikidse says

    August 8, 2014 at 3:36 pm

    I really like this idea, you did a great job

  6. Elaine says

    August 8, 2014 at 3:37 pm

    Thanks so much for stopping by! Really appreciate it!

  7. Elaine says

    August 8, 2014 at 3:37 pm

    Thanks Erin! Appreciate you stopping by!

  8. Elaine says

    August 8, 2014 at 3:38 pm

    Thanks Jennifer! 🙂

  9. Lisa Marie Wells says

    August 11, 2014 at 2:46 am

    That is an amazing idea!!! And it came out perfect!! Love the comforter!! Where did you find it??

  10. Elaine says

    August 11, 2014 at 2:48 am

    Thanks LIsa!! The comforter is the Shabby Chic collection from Target! Will be doing an entire blog post on Avery's big girl room soon and list all the items in it. Thanks for stopping by!

  11. Zachery Rollins says

    October 14, 2016 at 12:14 pm

    bookmarked!!, I like your web site!

    • houseofhargrove@gmail.com says

      October 14, 2016 at 8:40 pm

      Thank you so much!

  12. Sue Leroy says

    November 19, 2016 at 8:26 am

    very cool idea! Great Job

Meet Elaine

Subscribe to Our Newsletter

SM13-50-Burlap-Facebook SM13-50-Burlap-Instagram SM13-50-Burlap-Mail SM13-50-Burlap-Pinterest SM13-50-Burlap-TwitterBird BLOGLOVING

Home
Fashion
Beauty
Travel
Family
Food
Holidays

instagram
Open post by houseofhargrove with ID 18113439415655980
Happy Thursday! Loving the skirt we added under the sink. Make such a big impact for very little investment. 
💚🖤🤍🩶

Debating adding the word LAUNDRY on the door ➡️ to see inspo. Leave a comment with YES or NO. Thx!

Custom rug by @junestgeorge . I love it so much! Was able to design it and add a monogram.

Lighting by @steellightingco 

Builder & architect @josephpaulhomes
Open post by houseofhargrove with ID 18093739967085817
When designing our home I pulled inspiration from all over! Pinterest, Instagram, magazine, design books, etc. we had this long spot in our front entry that we were trying to figure out and when I saw this image (swipe to see) in @gilschaferthearchitect ‘s book it stopped me in my tracks. I loved the use of transoms and designated spaces. My architect @josephpaulhomes & his wife Michelle helped pull the whole look together. So happy with how it turned out.
Open post by houseofhargrove with ID 18082720118258276
My grandfather owned a grocery store in New Jersey. The scale hanging from the ceiling in our butler’s pantry was the scale in his store. My uncle had it for the longest time & gifted it to me when we moved into this home. I love it so much!! My mom has the cash register he used in his store in her home. I love decorating with items that have meaning & that tell a story.

🩵comment SHOP for links

🩵houses details like tile, wallpaper, paint colors, etc are on my blog. Just use the search bar to type in what you’re looking for.

https://liketk.it/5Whhj
Open post by houseofhargrove with ID 17984421167955439
I love hallways & nooks. They are a great way to add interest to your home. Natural light & details are key. This space connects our hearth room to the gameroom. The Dutch door goes out to our courtyard, the room at the end is my office and the door to the left (just out of the photo) goes to the pool bath. Lots going on in this space.
I saw this floor pattern in a design book & had to have it somewhere in our home. I love it so much!

Builder & architect @josephpaulhomes
Open post by houseofhargrove with ID 18094572700970007
Bathrooms are such a fun space to make bold choices. They are small so every decision & detail makes a big impact. Still in love with this wallpaper from @wallpapersgalore_ 

💚 comment SHOP for sources

https://liketk.it/5U3Lm
Builder & architect @josephpaulhomes
Open post by houseofhargrove with ID 18001463657885683
Omg this is so me!! Anyone else?
Open post by houseofhargrove with ID 18145131853474490
✨REMODEL UPDATE: FAMILY ROOM✨

This family room had good bones, but we needed to declutter , maximize storage, update furnishings & make the space more functional.

🤎comment SHOP for sources
➡️ swipe to see before & after photos

There was a wall of shelves that was just too much. We purged and decorated with items that she loved & had sentimental value. So many homes are built with tons of open shelving and you have to be really careful in these spaces because they can become a spot for clutter instead of being intentional. 
•added cabinet doors to 2 sections of shelves for some much-needed hidden storage.
•utilized the shelving that was separate from the other ones to make a designated bar space that is intentional and great for entertaining.
•found an gorgeous antique bar back to go against the wall that again is used as a bar when they entertain. Previously, it was a huge bench that took up width, but added no height to the wall. This is a major focal point in this space so we made it both functional and beautiful.
• I am not a huge fan of sectional couches unless they are in very specific areas. I think sometimes when people have a big room, they look for a big furniture to take up the space but it doesn’t actually give you the most seating and the spacing is sometimes awkward. They still really wanted a leather couch in there so we kept that, but then used more tailored chairs to frame the space.
• found this gorgeous coffee table on Facebook marketplace. Such a find!
•Removed the huge windmill fan that really took away from the gorgeous architecture of the ceiling with the beams.
•filled in dead space with functional furniture, like a cute table perfect for  game night.
•scaled back the TV so it made more sense over the fireplace and went with a frame one so there could be pretty art up there as it is a main focal point. (Art was off in this photo, but typically it looks like a vintage painting)

So excited with how this space turned out. It’s lighter, brighter, more functional & a better use of space. They have walls of windows along the back of the house with a beautiful view and now you’re able to focus on that more.

https://liketk.it/5RbVJ
Open post by houseofhargrove with ID 18024313262618581
Still loving my office!
🩵💚

Comment SHOP for sources

https://liketk.it/5SpAN
Builder & architect @josephpaulhomes
Open post by houseofhargrove with ID 17872793673519814
✨REMODEL UPDATE: DAUGHTER’S BATHROOM ✨

Throughout this remodel you will see two constant goals…brighten up the spaces & add functional storage. This bathroom was dark & dated. We took everything out and had a fresh start. 

🩵 comment SHOP for sources

•New paint, wallpaper, tile, fixtures, lighting, etc.
•Raised the height of the counters & some additional cabinetry extending up to the ceiling for much needed storage. 
•Added cute details to the side of the counters
•Removed the tub & added a glass door to the shower to make the space feel bigger & more open.

https://liketk.it/5Rkqu
Open post by houseofhargrove with ID 18119773333608662
This sweet girl has brought us so much joy! We are “foster failures” & couldn’t be happier about it. Callie has been the best addition to our family.
Chat GPT made this cute art from our Christmas picture of her. She was living her best life with all the ribbon from the presents.
Open post by houseofhargrove with ID 18082008950246533
I love a mudroom! I don’t care what size house I live in from here on out I’ll always have some “mudroom” space…even if it’s a tiny little spot. It’s so great to have a drop zone to keep organized. This space got lots of use during our ice storm with all the wet shoes, etc & these brick floors were great!! 

🩵 comment SHOP for sources
*Visit my blog for house details such as flooring, paint colors, etc

Builder & architect @josephpaulhomes

https://liketk.it/5R64Y
Open post by houseofhargrove with ID 18091934326829577
Feels strange getting back to work this week. We’ve been living in PJs and been asking what day it was for about a week now. Snowmageddon 2026 was fun & we still have piles of ice on the ground….BUT nice to go back to a bit of a routine. January felt like 47 days 🤪

🩵 you can find house resources like paint, lighting, etc on my blog.

Builder & architect @josephpaulhomes
Open post by houseofhargrove with ID 18091925479993495
🤣
Open post by houseofhargrove with ID 18006955580829618
The last few days have been so much fun. Quality time watching shows, playing Mahjong, sledding, gathering with friends, game nights, delicious food, yummy candles, snuggles, fireplaces….making memories ❄️🩵
Open post by houseofhargrove with ID 18059803292649710
Texas snow (more like ice) 2026 edition ❄️

Builder & architect @josephpaulhomes
Open post by houseofhargrove with ID 17951034275942712
Sounds like a Texas snowstorm is headed our way ❄️ perfect time for baking & comfort food

🤍 comment SHOP for sources
Head to my blog for details like tile, paint, etc

https://liketk.it/5NO7o

Builder & architect @josephpaulhomes
Open post by houseofhargrove with ID 17902254294196326
Enjoyed our long weekend! Hope y’all did too!

You can find all housing details, including flooring, paint, trim, lighting, etc. on my blog. Just use the search bar and type in what you are looking for.
www.houseofhargrove.com

Builder & architect @josephpaulhomes
Open post by houseofhargrove with ID 18149217859447761
@whittneyparkinson kitchen is so dreamy! Absolutely obsessed with it! The pot rack, the tile…all the timeless details!! ❤️
Open post by houseofhargrove with ID 18024145019610072
Will never not love this ceiling! 🩵🤍
@spoonflower @danikaherrick 

Comment SHOP for links
https://liketk.it/45NHj

Builder & architect @josephpaulhomes
Open post by houseofhargrove with ID 18123798754550475
🤣🍷
Open post by houseofhargrove with ID 18119894860500184
I love a little nook because it’s the perfect spot for fun wallpaper. Love this one from @loomwell 
Design: Elodie

🩵 comment SHOP for links
https://liketk.it/5L22F

Builder & architect @josephpaulhomes 

https://liketk.it/5L22F

House of Hargrove | Site Design via Self Made from Scratch


Disclosure Policy . Privacy Policy Bluehost